
- Mindora Pulse
Table of Contents
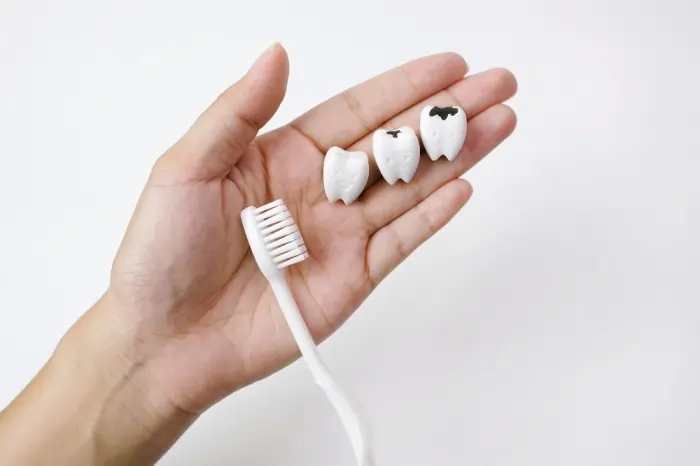
The 5 Stages of a Cavity: What Each One Looks Like, Feels Like, and Costs to Fix
A cavity doesn’t appear overnight. It moves through five distinct stages – starting with an invisible loss of minerals in the enamel and ending, if untreated, in a painful abscess that can spread to the jaw. The stage you’re at determines what treatment you need, what it costs, and whether anything can still be reversed. This guide breaks down every stage clearly, with examples, visual descriptions, and practical tips for each one.
Here’s the important thing to understand before we go further: only Stage 1 is reversible. Every stage after that causes permanent damage. The earlier you act, the simpler and cheaper the fix.
Quick Overview: All 5 Stages at a Glance
According to MedlinePlus, tooth decay is one of the most common health problems in the U.S. and progresses in predictable steps. Understanding where you are in that progression is the fastest way to take the right action.
| Stage | Name | What's Happening | Pain? | Reversible? | Treatment | Approx. Cost |
|---|---|---|---|---|---|---|
| 1 | White Spot | Enamel losing minerals - no hole yet | None | Yes | Fluoride varnish | $25–$75 |
| 2 | Enamel Decay | Acid breaks through the enamel surface | Usually none | No | Small filling | $150–$300 |
| 3 | Dentin Decay | Decay reaches the softer layer under enamel | Mild–moderate | No | Larger filling or inlay | $250–$700 |
| 4 | Pulp Involved | Bacteria reach the nerve and blood supply | Moderate–severe | No | Root canal + crown | $1,900–$3,500 |
| 5 | Abscess | Infection spreads to bone and surrounding tissue | Severe | No | Root canal or extraction + antibiotics | $2,000–$5,500+ |
Stage 1 - White Spot Lesion (The Only Reversible Stage)
STAGE 1 – White Spot Lesion – Reversible
What’s happening: Acid from bacteria is leaching calcium and phosphate out of the enamel. No hole has formed yet – but the structure is weakening.
What it looks like: A faint chalky or opaque white patch on the tooth surface. Often visible on the smooth front face of a tooth, or in the grooves of a molar.
What it feels like: Nothing. Zero pain, zero sensitivity. Most people have no idea it’s there.
Can it be reversed? Yes. This is the only stage where the process is completely reversible.
What an Early Stage Cavity Actually Looks Like
Imagine a small patch on your tooth that looks slightly duller than the surrounding enamel – like a tiny chalky smudge. It doesn’t reflect light the way healthy enamel does. On back teeth (molars), it might appear as a faint discoloration inside a deep groove. On front teeth, it often shows up as a white spot near the gumline or between teeth.
A common question: is it a cavity or just a stain? A white spot lesion has a flat, matte appearance – it doesn’t scrape off, doesn’t change with polishing, and stays in the same spot. A simple stain tends to sit on the surface, may have a brown or yellow tint, and often lifts with a professional cleaning.
Stage 1 Treatment and Tips
- Fluoride varnish applied at the dental office. The dentist paints a concentrated fluoride solution onto the affected area. It absorbs into the enamel and stimulates remineralization – the process that rebuilds mineral content without any drilling.
- Prescription-strength fluoride toothpaste at home. Standard over-the-counter toothpaste contains 1,000–1,450 ppm fluoride. Prescription versions contain up to 5,000 ppm and are significantly more effective for active early lesions.
- Remineralizing products containing calcium phosphate. Certain over-the-counter products (like those containing hydroxyapatite or casein phosphopeptide) can support enamel repair alongside fluoride.
- Cut the frequency of sugar exposure. Every time you eat or drink something sugary, bacteria produce acid for about 20 minutes. Reducing how often that happens gives enamel time to remineralize between exposures.
Real Example: Stage 1
Maya, 28, goes to a routine checkup after 18 months without seeing a dentist. The hygienist spots a small white spot lesion on her lower left molar – no decay has broken through the enamel.
Treatment: Fluoride varnish applied in 5 minutes. Prescription toothpaste recommended for home use. Dietary advice: stop sipping iced coffee throughout the morning.
Follow-up: Six months later, the lesion has remineralized and is no longer detectable. No drilling, no filling, no anesthesia. Total cost: $40.
The same lesion, ignored for another year, would likely require a filling
Stage 2 - Enamel Decay
STAGE 2 – Enamel Decay – Permanent, But Small
What’s happening: The acid has dissolved enough enamel to create a microscopic hole. The surface has broken down.
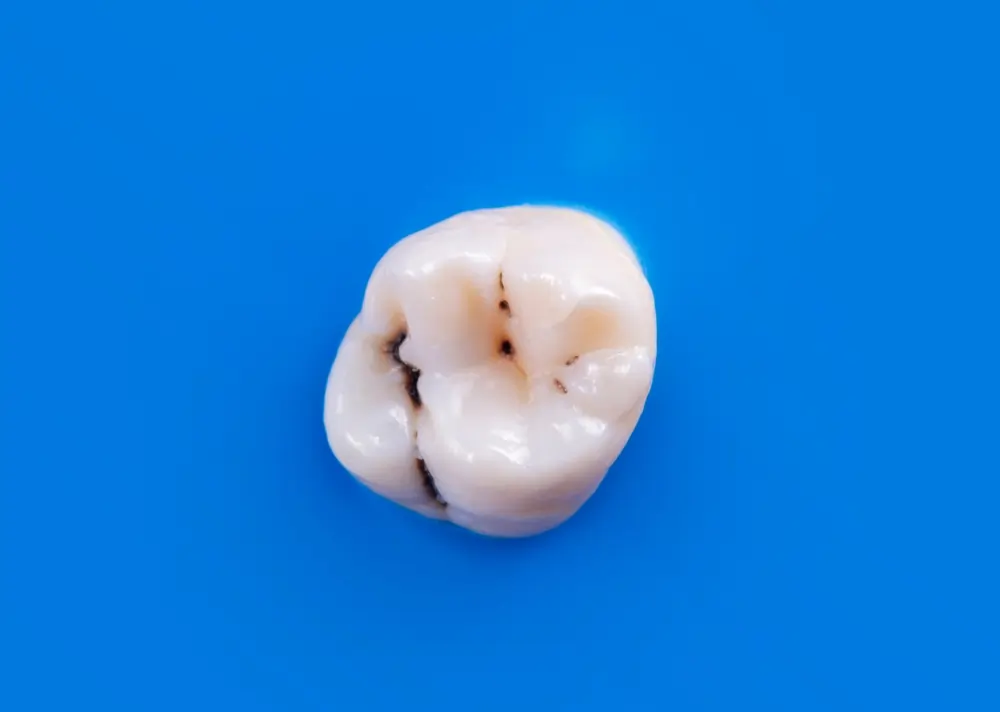
What it looks like: A small brown or dark dot, often sitting in a groove or pit on the chewing surface of a molar. May appear as a brown line between two adjacent teeth on X-ray.
What it feels like: Usually nothing. Some people notice very brief sensitivity to something very cold or very sweet – but many feel no symptom at all.
Can it be reversed? No. Once enamel has a hole, it cannot rebuild itself. A filling is needed.
Stage 2 Treatment and Tips
- Tooth-colored composite filling. The dentist numbs the area, removes the softened enamel with a drill or laser, and fills the space with composite resin. One appointment, typically 45–60 minutes. Lasts 7–12 years on average.
- Silver amalgam filling. A more durable alternative for back teeth. Less aesthetically pleasing but often preferred for large back-tooth cavities because of its strength and longevity (10–15+ years).
- Silver diamine fluoride (SDF). Used in some cases – especially for young children or patients who cannot tolerate drilling – to arrest active decay at the enamel surface. The cavity turns black, but no drilling is required.
The most important tip for Stage 2: do not wait for pain before booking the appointment. At this stage, the treatment is simple, quick, and relatively inexpensive. Waiting for symptoms means waiting for Stage 3 or 4 – which involve significantly more discomfort and cost.
Stage 3 - Dentin Decay
STAGE 3 – Dentin Decay – This Is When You Start Feeling It
What’s happening: Decay has moved through the enamel and into the dentin – the softer, yellowish layer that makes up most of the tooth. Dentin contains microscopic tubes that connect to the nerve, which is why sensitivity begins here.
What it looks like: A clearly visible brown or gray area. The discoloration may be visible through the enamel as a shadow. On a molar, the entire groove may appear darkened.
What it feels like: Sensitivity to cold, sweet, or acidic foods – often a brief, sharp twinge. Some people notice discomfort when biting down.
Can it be reversed? No. The dentin cannot rebuild itself the way enamel can
Stage 3 Treatment and Tips
- Larger composite or amalgam filling. Same process as Stage 2 but the cavity is bigger, so more tooth structure is removed and the filling is larger. Still a one-appointment procedure for most cases.
- Ceramic or gold inlay or onlay. When decay covers a larger portion of the chewing surface, a lab-fabricated inlay (filling within the cusps) or onlay (covering one or more cusps) provides a stronger, longer-lasting restoration. Requires two appointments.
- Watch sensitivity closely. If sensitivity lingers more than 30 seconds after a cold or sweet stimulus fades, the decay may already be closer to the pulp than an X-ray can confirm. Tell your dentist – they may decide to monitor for pulp health before placing a permanent restoration.
Real Example: Stage 3
James, 41, notices a twinge of sensitivity on his upper right molar when drinking cold water. He puts off the appointment for four months because it’s not constant pain – just occasional.
By the time he goes in, the cavity has expanded to cover two surfaces of the molar. What would have been a single-surface filling at Stage 2 ($180) is now a two-surface filling ($320) with a follow-up X-ray to confirm the nerve is not affected.
He got lucky – the pulp was untouched. A few more months and he would have been looking at a root canal.
Stage 4 - Pulp Involvement
STAGE 4 – Pulp Involvement – Root Canal Territory
What’s happening: Bacteria have reached the pulp – the soft tissue at the center of the tooth containing the nerve and blood vessels. The pulp becomes inflamed (pulpitis) and, without treatment, begins to die.
What it looks like: Visible pit or crater in the tooth. The surrounding enamel may look gray because decay is visible through it. The tooth may look darker than its neighbors.
What it feels like: Moderate to severe pain, often when biting or chewing. Sensitivity to both cold AND heat. Spontaneous throbbing pain that doesn’t need a trigger. Pain that lingers long after the stimulus is gone.
Can it be reversed? No. Root canal treatment or extraction is the only option.
Stage 4 Treatment and Tips
- Root canal therapy. The dentist or endodontist removes the infected pulp tissue, cleans and shapes the root canals, fills them with a rubber-like material called gutta-percha, and seals the tooth. Contrary to its reputation, modern root canal treatment is no more uncomfortable than a regular filling for most patients.
- Dental crown after root canal. A tooth that has had a root canal is more brittle and needs a crown to protect it from fracture – especially a molar that absorbs significant chewing force. The crown is typically placed 1–2 weeks after the root canal.
- Don’t confuse spontaneous pain with sensitivity. If your tooth aches without any trigger – wakes you up at night, or just starts throbbing mid-afternoon – that’s spontaneous pain. It almost always means the pulp is involved. Don’t wait for it to get worse.
Stage 5 - Abscess
STAGE 5 – Dental Abscess – Emergency Stage
What’s happening: The pulp has died and the infection has spread through the tip of the root into the surrounding bone and soft tissue. A pocket of pus forms – that’s the abscess.
What it looks like: Visible swelling in the gum, cheek, or jaw. A raised, tender bump (like a pimple) near the tooth. The tooth itself may look darkened or damaged.
What it feels like: Constant, severe throbbing pain. The tooth may feel raised or loose. Swallowing or opening the mouth may be painful. Fever and swollen lymph nodes are possible.
Can it be reversed? No. This is a medical emergency. Dental abscesses can spread to the throat, neck, and beyond.
- Root canal with drainage. If the tooth structure is salvageable, the endodontist drains the abscess, performs root canal therapy, and prescribes antibiotics to eliminate remaining infection.
- Surgical extraction. If the tooth cannot be saved – because too much bone has been lost or the root is fractured – the tooth is removed. The socket is cleaned and antibiotics are prescribed.
- Emergency room if fever or swelling spreads. If fever accompanies the tooth pain, or if swelling extends to the jaw, neck, or eye area – go to an emergency room, not just a dental office. Spreading oral infections can become life-threatening.
⚠ Stage 5 Warning Signs – Act Today
- Constant throbbing pain that doesn’t let up
- Visible swelling in the cheek, jaw, or gum
- Fever with tooth pain
- Pus or a raised bump near the tooth
- Difficulty swallowing or opening your mouth fully
- These are signs of a dental abscess. Do not wait for a regular appointment.
At What Stage Does a Cavity Start Hurting?

This is one of the most common questions people ask – and the answer is later than most people expect.
| Stage | Pain? | Type of Pain |
|---|---|---|
| Stage 1 - White Spot | No pain | None - this is the silent stage |
| Stage 2 - Enamel Decay | Usually no pain | Possibly a very brief twinge with extreme cold or sweet |
| Stage 3 - Dentin Decay | Mild to moderate | Brief, sharp sensitivity to cold, sweet, or acidic; discomfort when biting |
| Stage 4 - Pulp Involved | Moderate to severe | Spontaneous throbbing; lingering pain after cold or heat; pain when biting |
| Stage 5 - Abscess | Severe and constant | Non-stop throbbing; pain radiates to jaw or ear; swelling adds pressure |
The practical implication: if you’re waiting for pain before you go to the dentist, you’re already at Stage 3 at best. Stages 1 and 2 – the two cheapest and fastest to treat – almost never produce any pain at all. This is why routine checkups with X-rays matter so much. Most early cavities are found on film, not from symptoms.
Which Stages Can Be Reversed?
The short answer: only Stage 1. But that needs some context.
Reversal vs. Arrest – An Important Distinction
REVERSED means the damaged structure is actually rebuilt – the enamel remineralizes and the lesion disappears. This is only possible at Stage 1, when no hole has formed.
ARRESTED means the active decay process is stopped, but the damage remains. Silver diamine fluoride (SDF) can arrest Stage 2–3 cavities in some cases – particularly in young children or high-risk patients where drilling is not practical. The cavity turns black and stops progressing, but it still needs to be restored eventually.
FILLED means the hole is cleaned and sealed, but the lost tooth structure is replaced with a material, not regenerated. This is what happens at Stages 2, 3, and 4.
| Stage | Can It Be Reversed? | What That Means in Practice |
|---|---|---|
| Stage 1 | Yes - fully reversible | Fluoride + remineralizing treatment + dietary changes can rebuild the enamel. No filling needed. |
| Stage 2 | No - but it's small | A hole has formed. Needs a filling. But it's a small, inexpensive, quick fix. |
| Stage 3 | No | Needs a filling, inlay, or onlay. Act before it reaches the nerve. |
| Stage 4 | No | Root canal therapy required. The tooth can be saved but not reversed. |
| Stage 5 | No | Emergency treatment. Focus is on saving the tooth or preventing infection spread. |
Cavity Stages by Tooth Type
The same five stages happen in every tooth – but how quickly decay progresses, and how early you’ll notice it, varies by location.
| Tooth Type | Where Decay Usually Starts | How Fast It Progresses | When You'll Likely Notice It |
|---|---|---|---|
| Molar (back tooth) | Deep grooves and pits on the chewing surface | Moderate - enamel is thick but grooves are deep | Stage 3 - cold sensitivity when eating or drinking |
| Molar (between teeth) | Contact zone between two adjacent molars | Moderate - often not caught until Stage 3 | Stage 3 - often found on X-ray before symptoms |
| Front tooth | Smooth surface or between teeth | Moderate - thin enamel accelerates to dentin faster | Stage 2–3 - visible dark spot or shadow through enamel |
| Root / gumline | Exposed root surface below gum margin | Fast - no enamel layer, just cementum | Stage 2–3 - sharp sting at the gum margin |
Molar cavities are the most common and the most often caught at a later stage because the early signs are hidden in deep grooves. Early stage cavities in molars – particularly pit and fissure cavities – are the primary reason dentists recommend sealants for children when the first and second permanent molars emerge.
Key Takeaways
- Only Stage 1 is reversible. It’s the only stage where fluoride can fully rebuild what was lost – no drilling, no filling, no anesthesia required.
- Pain starts at Stage 3 – but the cavity starts at Stage 1. Two full stages pass with no symptoms at all. Waiting for pain before seeing a dentist means you’ve already missed the window for the simplest, cheapest treatment.
- Each stage roughly doubles the cost and complexity of treatment. A Stage 1 fluoride treatment costs $25–$75. A Stage 4 root canal and crown costs $1,900–$3,500. The earlier you act, the better the outcome in every dimension.
MindoraPulse – Your Mental Health Hub
MindoraPulse brings you trusted insights, expert tips, and practical guidance on mental health and wellness. Explore MindoraPulse to stay informed and support your well-being.
Frequently asked questions
How many stages does a cavity have?
A cavity progresses through five stages: Stage 1 is a white spot lesion (enamel demineralization), Stage 2 is enamel decay (small hole), Stage 3 is dentin decay (sensitivity begins), Stage 4 involves the pulp or nerve (pain and root canal territory), and Stage 5 is an abscess (spreading infection requiring emergency care). Each stage is more serious and more expensive to treat than the one before it.
What does an early stage cavity look like?
The very first stage looks like a small chalky or opaque white patch on the tooth surface – duller than the surrounding enamel but with no visible hole. By Stage 2, this becomes a small brown or dark dot sitting in a groove or on the smooth surface of the tooth. On X-ray, it appears as a faint dark shadow inside the enamel. Neither stage typically causes pain, which is why most early cavities are caught during routine checkups rather than by symptoms.
Can a Stage 1 cavity be reversed?
Yes. A Stage 1 white spot lesion is the only cavity stage that is fully reversible. Because no hole has formed yet, fluoride varnish, prescription-strength fluoride toothpaste, and remineralizing products can rebuild the enamel structure and eliminate the lesion entirely. Reducing the frequency of sugar exposure helps significantly. Once decay progresses to Stage 2 and a hole forms, that tooth structure is lost permanently and a filling is needed.
Can a Stage 2 cavity be reversed?
No. Once acid has broken through the enamel surface and created a hole, the damage is permanent. Enamel cannot grow back to fill an opening. A small composite filling is needed to seal and restore the tooth. That said, Stage 2 is still an excellent time to act – the treatment is one short appointment, requires minimal drilling, and typically costs $150–$300. Silver diamine fluoride can arrest (stop) the decay in some cases, but it doesn’t rebuild the tooth structure
At what stage does a cavity start to hurt?
Most people first notice discomfort at Stage 3, when decay reaches the dentin layer. Dentin contains microscopic tubules that connect to the nerve, so it produces brief sensitivity to cold, sweet, or acidic foods. Before Stage 3, the majority of people feel nothing at all – Stages 1 and 2 are typically painless. Significant or spontaneous pain typically signals Stage 4, when the nerve itself is involved.
What does a Stage 3 cavity feel like?
A Stage 3 cavity in dentin typically produces a brief, sharp twinge when you eat or drink something cold, sweet, or acidic. It lasts a few seconds and then fades. Some people notice mild discomfort when biting on that tooth. Others feel nothing and the cavity is discovered on a routine X-ray. If sensitivity starts lingering for more than 30 seconds after the trigger is gone, the decay may be approaching the pulp and warrants prompt evaluation.
What happens if I don't treat a Stage 2 or 3 cavity?
An untreated cavity at Stage 2 or 3 will continue to deepen. Dentin is softer than enamel, so decay accelerates once it gets past the outer layer. Within months to a year – depending on diet, hygiene, and individual variation – Stage 2 commonly progresses to Stage 3 or 4. What starts as a $150 filling becomes a $2,000+ root canal and crown. There is no scenario in which waiting makes a cavity better.
How do I know if I'm at Stage 4 or Stage 5?
Stage 4 involves the nerve – you’ll know it because the pain becomes spontaneous (no trigger needed), constant, or lingers long after cold or heat. Stage 5 is an abscess – infection has spread and you’ll typically see swelling in the gum or face, feel a raised tender lump near the tooth, and may have fever or difficulty opening your mouth. If you have any of these signs, don’t wait for a scheduled appointment – contact a dentist that day.
Can cavities in molars be treated at early stages?
Yes, and early treatment in molars is particularly effective because molar enamel is thick – it takes longer for decay to progress through it. A white spot lesion or small cavity in the groove of a molar can often be treated with fluoride alone (Stage 1) or a small filling (Stage 2) in a single short appointment. Dental sealants applied to permanent molars when they first erupt are the best preventive tool available – they reduce molar cavity rates by up to 80% according to CDC data.
What does current guidance say about reversing early cavities?
According to MedlinePlus, a service of the U.S. National Library of Medicine, fluoride is the main evidence-based method to arrest early enamel decay and support remineralization. Dentists may apply professional fluoride varnish, and patients are advised to use fluoride toothpaste or other home fluoride products. Emerging research shows that bioactive materials, such as hydroxyapatite and amorphous calcium phosphate, may help repair enamel beyond fluoride alone. Additionally, dietary counseling to reduce acid exposure supports enamel protection and remineralization.